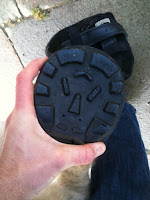
So, now that your shiny new hoof boots have arrived in the post, now is the time for the ultimate test- do they fit (and do they make your horse look just that little bit more stylish?)? I highly recommend using a thick plastic bag covering the feet prior to your first fitting (such as an old feed bag) so that you minimise the chances of dirtying the boot in case you need to exchange it for a different size. Pictured here are the Cavallo style and Easyboot Glove style boots modeled by my wife's horse, Zeno- but the principles apply for others in the field.
1) Ensure your boot is fully open and all the fastening is undone (if using a trainer type boot, ensure the inner tab is flexed away from the center of the boot. If your boot came with pastern wraps, leave them off to check the fit, and add them in later. Design permitting, fold the outer down over the sides of the boot before attempting to fit.
2) Holding your horse's pastern with one hand, use the other to maneouver the boot over the foot toe-first. It is very important that the toe is fitted into the toe of the boot or there may be chafing or damage to the boot.
3) Once the toe is in, bring the heel into the back of the boot (if you are using a compression-fit boot, there is usually a ridge here to grip onto the heel/frog). And roll up the outers if you had folded them down initilally, but do not fasten yet.
4) *for trainer-style boots only* Grip the bottom of the boot and rotate it around the foot- there should be enough play to turn it 20 degrees or so but not enough to rotate it around the foot. Other styles should have little or no rotation when fitted to the foot. (In the case of Easyboot Gloves, I highly recommend gettinga rubber mallet to tap them into place so that you get adequate heel grip).
5) Gently lower the leg down and allow the horse to put his weight into the boot.
6) Lift the leg and check the fit again, if you got the hoof position correct the first time, the fit should remain the same.
7) Gently lower the leg and fasten the boot. If using trainer-style boots, ensure there is two-fingers' worth of space between the fastened outer and the pastern to avoid chafing.
8) Assuming that everything has progressed well and seems to be fitting properly fit the pastern wraps, repeat the process on the other foot/feet and take them out for a short test ride (though, with the trainer-style boots especially, keep the sessions/intensity short until the material has had a chance to break-in... usually about a fortnight).
9) Ride and enjoy!
If you have any doubt, always check with an appropriate hoofcare professional or the company help desk.
If your horse has feet that are inbetween sizes, I recommend using some closed-cell foam padding (or a gardening kneepad at a push) and cutting a wedge to glue in the loose side of the boot- though this is only really an option with trainer-style boots as they are more forgiving with their fastenings... if it is an intereference-fit type boot you may have to change to a different style.
Maintained properly (ie regularly hosed out and dried), boots should last about 1-3 years depending on workload and frequency of use (Zeno's Cavallos lasted 2 1/2 years of hard work before we had to replace them due to a hole in the uppers), so are great value for money.
soundandshoeless
Tuesday 25 October 2011
Sunday 16 October 2011
Wake Up!
OK- ready yourselves, I'm about to set off on a bit of a rant...
Why- in this day and age- is the equine world so afraid of upsetting so-called 'professionals' and 'businessmen' that we let it limit what we can and can't do with OUR animal? How often have I heard - 'I can't do ... or I can't have ...... out to see my horse because it might upset my farrier/yard owner'? Why has everyone lost track of the fact that WE are paying these people for a service - we are not indebted to them or reliant upon their approval. Moreover- they must be providing a good service for the money we give them- especially yard owners. So many act as if we are indebted to them for simply allowing us a place on the yard- are we blind to the fact that we are their customers? Who among us would let the man who owns the car park dictate which mechanic we use- let alone obey him out of fear he may be upset by our defiance? Who would shop at a store where, if they found out you shopped around, they would threaten you with banishment? No- this is not the way that professionals and businessmen act, regardless of what one may call oneself. What is lacking in the horse world is the willingness to act and vote with our feet (or pound) and let those who don't provide a good service or product suffer. In fact, this is the essence of our capitalist way. Competition fosters innovation and good business practices- but only if we use it as a tool to help ourselves. And yet- we do realise this, and act accordingly in our daily lives... apart from any equine service! Why are we bending over backwards to please people that we are paying to serve us??
Now, I know you're going to wave the hippocrite flag here because I am an equine professional myself. And I am. However, when I receive criticism or a client leaves- I use this criticism (if constructive) to better my service and address those areas which caused complaint. I don't rebound defensively upon my client for having expectations of my service. In fact, the better I can serve my clients, the happier they will be and the more they will recommend me (and this makes me happy in the end)- it's my responsibility as the service provider to give a good value-for-money product. If only more yard owners did the same.
Saturday 15 October 2011
Wose Than it Looks?
Often, with feet, things are not entirely as they seem. To the untrained eye, feet look horrific but the cause can be entirely cosmetic... other times they look OK, but are severely compromised. This is especially true of horses who are recently out of shoes and get crumbly wall. Due to this fact, it is important to consult an experienced hoof care professional when in doubt.
So, why does this incongruence exist? Surely more poorly hooves should look worse!
The first important concept to remember is that different parts of the foot have unique functions, and some relate more directly to hoof soundness than others. For example- the wall may look horribly cracked and broken and flaking at the ground surface, but this generally isn't such a problem providing that the sole and frog are healthy and there are no underlying pathological conditions. Far more important to the health and soundness are the sole and frog. Provided these are healthy, a cracking/flaking wall is relatively inconsequential regarding soundness- (but is an important issue to be addressed nevertheless). The material currently on the ground surface is also at least 3 months old (possibly older depending on the horse), and so doesn't necessarily reflect the health of the internal hoof. An experienced practitioner will be able to tell you whether what you're seeing is problematic or merely a remnant of previous damage.
This leads to our next point- that the health of the internal hoof is not necessarily reflected in the current hoof structure. This can go both ways - i.e: a poorly looking hoof may be healthy and on the mend inside, or a healthy looking hoof may be severely compromised internally. A case of the latter is seen in laminitis. Here we have a healthy looking hoof capsule that has undergone severe trauma. It is only after a significant period of time that the external hoof structure is modified to reflect this damage. It is only through physiologic signs and gait/bio mechanics evaluation that we can judge the internal hoof health.
Some horses may have congenital defects or acquired defects from past disease/trauma that give him a permanent deformity- but this may be entirely healthy in its deformed state.
And this is the real judge of hoof health- if it is structurally sound for the horse's needs, and that he is comfortable in the work expected of him. It is a plastic thing, and changes depending upon the demands placed upon your horse. Conversely, if the hoof becomes unhealthy- you must expect less of your horse until his hoof health recovers.
Monday 3 October 2011
New to Barefoot? What to Expect
So you've just had your horse's shoes taken off- well done! Here's some important things to be careful of while your horse adapts all the new stimuli getting to his feet:
1) Be patient. Your horse's feet have been protected by metal or plastic shoes for many years and need a chance to adapt to the new stimuli and wear they will be getting from the ground surface. Try and keep the work easy (this depends on the hoof health and you should ask your hoof professional for advice here) and on something cushioned like a sand school. If you're a bit impatient or worried about your horse losing fitness, you may wish to purchase hoof boots so you are able to get out and about hacking sooner.
2) Closely monitor the hooves for the first few weeks and contact your hoof care professional if you are worried about anything (especially raised pulses and heat). Occasionally feet can experience a re perfusion injury when the shoes are removed (especially if shod for a long time or very tightly)- this results from a compression of the circumflex artery of the pedal bone- and is akin to your arm 'falling asleep'... you know the feeling when you shake your arm out and get pain and pins and needles? This is what your horse is experiencing, and it will pass with no ill effects. This being said, things can go wrong if too much stimulus is added too quickly (especially if the feet are very unhealthy), and occasionally the horse may experience an abscess or corn if too much is done too soon. It is always best to seek advice from a professional who has experience in transitioning horses to barefoot.
3) Because your horse does not have the protection of a shoe 24/7, you will be able to see when he is slightly sore or footy. Believe it or not, this is a good thing! Because you can see every slight change in the hoof health as and when it happens, you can change and modify things accordingly to stop any problems as they start. You will also become a sort of hoof geek- I'm afraid. Remember, the patterns you see of soreness, etc were likely there before too, you just couldn't see them. The important thing is to record the details of when he is footy and try to establish a pattern (ie, grass flush causes soreness) and work with your hoof care professional to eliminate the source of the soreness, nit merely mask it. In the meantime, a good pair of boots/pads will keep him comfortable for work.
4) Bare feet are kinder to your fields, and to other horses and people (if kicked)- but handle differently on the wet and especially on jumps- take it easy at first and allow time for you and your horse to get used to how to handle these obstacles with his new feet. Usually there is always a bit of extra slip with bare feet, but don't worry- provided your horse is happy handling his feet he won't fall, and if you want the extra grip I recommend the Renegade boots with studs for things like cross country.
5) The hoof growth should catch up with your workload in about 6-9 months, but in the meantime keep an eye on the amount of foot left- especially if you do a lot of roadwork. If you need extra length, speak to your hoof care professional or use a pair of boots to protect the foot from wear.
6) Don't worry if you don't see dramatic changes immediately. remember that a healthy foot has to grow from the inside out, and not merely trimmed into shape- allow some time for the new growth to occur.
7) Find some fun activities to do regardless of what level of activity your horse is up to at the moment- even if you can only walk in-hand at the moment, take the opportunity to go on some nice walks and just enjoy being with your horse- your relationship will improve as well as the feet!
Saturday 1 October 2011
Dwarf Box for Short-Arse
Anyone who's seen my pony Angus will know that his is far grander than his meager size, and boy did the little man's ego take a beating today when we moved yards. As you can see from the picture below, his stable didn't come equipped for the vertically challenged.
So, taking pity on the poor soul whinnying in frustration, we installed a little boost for him.
Which seemed to sooth his wounded ego a bit, much to the consternation of other people and horses walking past, hearing 'stomp-stomp' and seeing a tiny head heave itself over the door. Score one for creative engineering! Perhaps next time something quieter.... a trampoline?
Help- my horse shrank in the wash!
So, taking pity on the poor soul whinnying in frustration, we installed a little boost for him.
Which seemed to sooth his wounded ego a bit, much to the consternation of other people and horses walking past, hearing 'stomp-stomp' and seeing a tiny head heave itself over the door. Score one for creative engineering! Perhaps next time something quieter.... a trampoline?
Happy Chappie!
Hoof Boot Guide Part II: Measuring Your Feet
Perhaps the most important step in fitting your horse with hoof boots is getting the correct size boot. This is especially so if you are ordering boots from an online seller (as nearly all of us do). To correctly size your feet, you will need the following items: a straight edge, a ruler or measuring tape, a permanent marker pen (if desired) and, of course, something to record your measurements on.
1) Ensure that your horse has just had a trim, as any additional growth may skew the measurements and give you a boot which is too big to be usable.
2) Using your straight edge, find the widest point on the foot (this is usually found just behind the apex of the frog. If you are unsure, take a couple of measurements and use the widest. If desired you may want to mark this line with your permanent marker and measure from this.
3) Moving to the back of the foot, place your straight edge along the back of the frog/heels as shown. Then measure the length of the foot from the toe (at midpoint) to the leading edge of the straight edge on the heels (the two points indicated on the picture). If desired you may want to mark this line with your permanent marker and measure from this.
4) If desired, place the hoof on a blank sheet of paper and trace around it using the permanent marker pen (you will need hard standing for this). This will give you the total outline of the foot and allow you to check the fit of the sole plate once you receive the boots without getting them dirty, and is also very useful if you intend to fit a pad to the boot.
Once you have the measurements for all four feet recorded, take the largest of the pair (for fores or hinds, whichever is applicable) and use this as your sizing measurement when ordering. Online sizing guides can be found here (http://www.easycareinc.com/our_boots/easycare-hoof-boots.aspx#&panel1-1) for Easycare products, here (http://www.cavallo-inc.com/products/hoof-boots/fit.html) for Cavallo boots, and here (http://www.renegadehoofboots.com/sizing.html) for Renegade hoof boots.
For more, see my See Hoof Boot Guide Part II: Testing the Fit
Your Horse's Pulse: How to Take it and What it Means
One very simple and useful tool that everyone can use to check on hoof health is the distal pulse. This is the pulsing of the main artery into the hoof from the upper body. Normally this pulse should be barely detectable (especially if you're new to taking pulses), but will change character when inflammation is present, making it fuller and stronger (An important side note here is that when we speak of monitoring the pulse, we are interested in the quality and strength of the pulsation in this one specific area as relating to inflammation, and not making sweeping statements about the systemic vasculature or monitoring pulse rate for disease. Think about feeling the throbbing sensation in your thumb after whacking it with a hammer versus having your vitals checked at the doctors.)
Put simply, if inflammation is present to any degree in the hoof the pulse will strengthen and become fuller when palpated on the pastern. This is due to the lack of expansion available in the hoof capsule- as inflammatory fluids engorge the tissues, pressure increases in the hoof and there is more back pressure in the artery, resulting in the 'raised pulse'. So, while not a perfect or detailed tool, it does give us some information as to the state of the tissues inside the hoof. The best way to monitor your horse is to start with a one-week check, using the following method:
1) Use a sheet of paper to draw columns for AM Pulse, PM Pulse (and Midday /Night if you wish- the more information the better). Make a note of the time of day you intend to monitor the pulse- it doesn't matter a great deal, but the times should be consistent throughout the week. A good method of doing this is to take it after their morning/evening feed through the wintertime. Some additional information about any changes in the feed that day or field moves/changes will also be useful.
2) Locate the correct area to measure the distal pulse. It lies in the soft area just behind the bony mass of the pastern.
3) Cup your hand as shown and wrap it around the pastern from the front. The front part of the pastern should be resting in the soft area between your thumb and forefinger.
4) Close your fingers and thumb gently around the back of the pastern, but try not to squeeze- if the pulse isn't significantly raised you may not feel any pulse if too much pressure is applied. The pulsations should occur somewhere along the length of your thumb and forefingers, take some time to get the feel for it.
5) Once you've felt the pulse, note it on your form using a scale from 1-5 ( 1 being just barely detectable and 5 a pulse so strong you can see it through the hair).
6) Repeat the exercise on all four feet, and follow the measurements the rest of the week. At the end, you should have an idea as to when the pulses are raised and what a 'normal' pulse is for your horse at this time. Once you get in the practice, it is useful to have a feel of the pulses as you pick the feet out and see if a raised pulse is corresponding to napping or stroppy behaviours and lameness.
Subscribe to:
Posts (Atom)